How to build a fireplace mantle/surround (Phase 2 – Fireplace Reveal!)

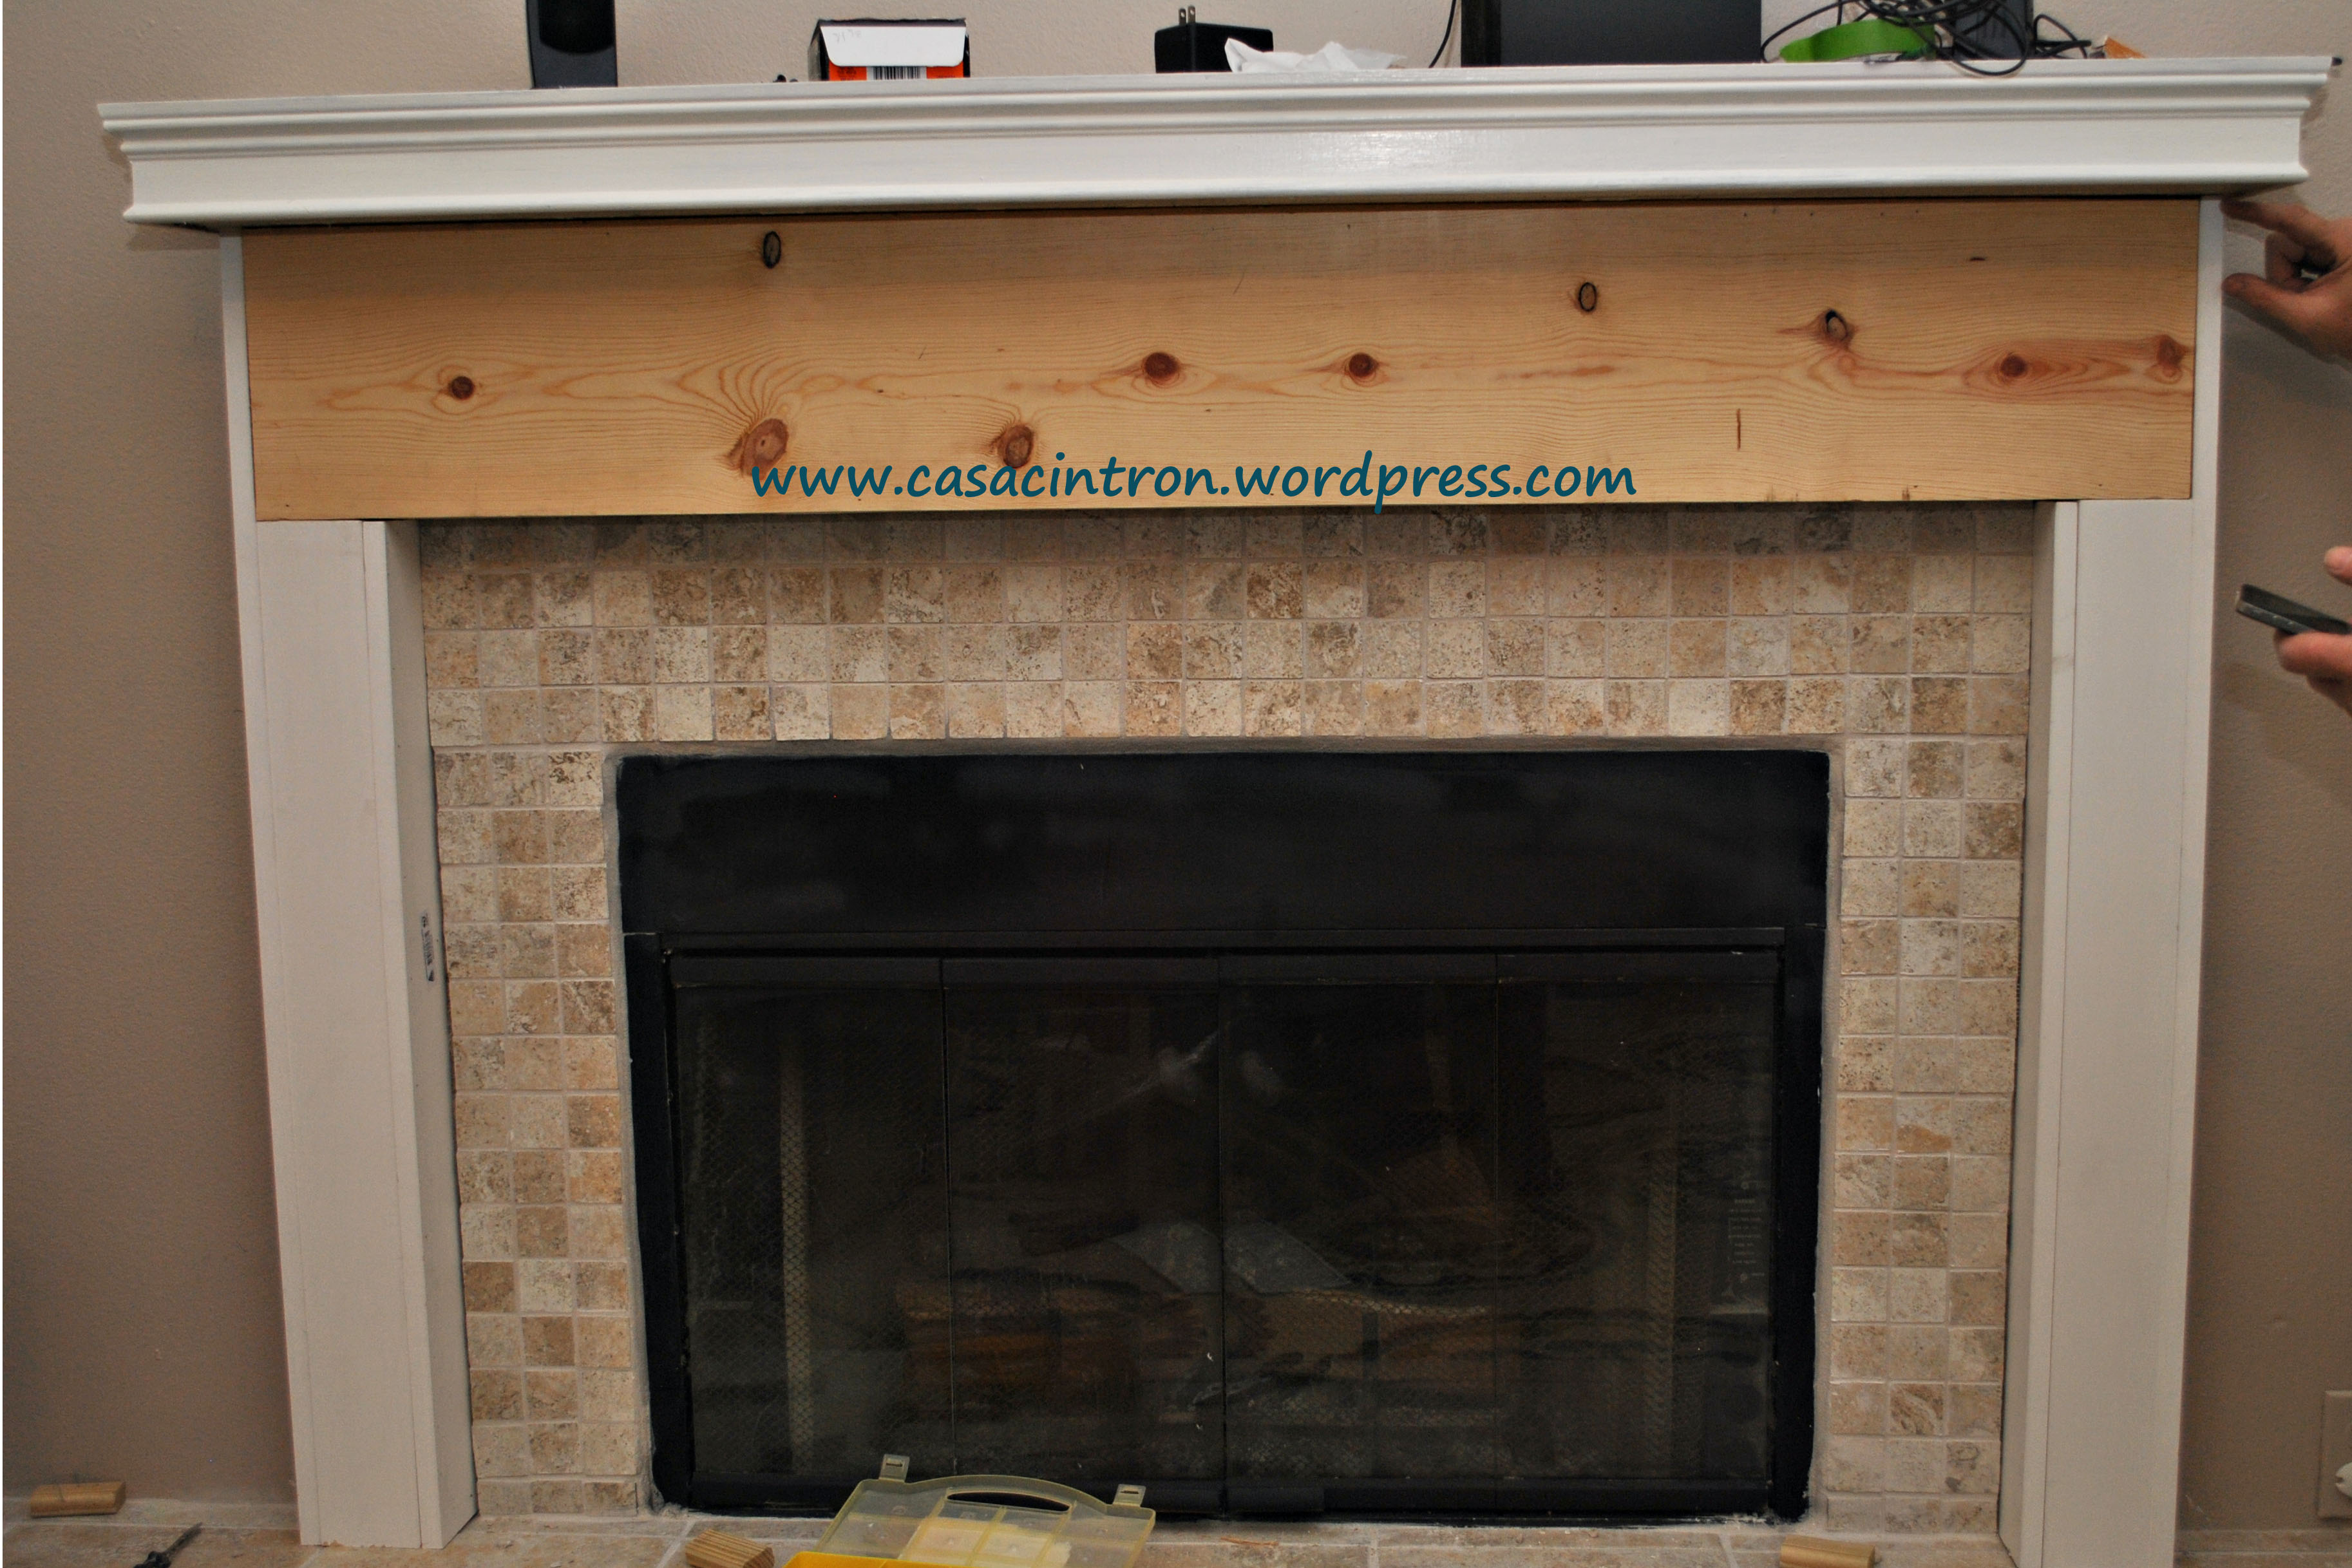
We have finally finished our fireplace makeover! Hurrah!!! A few weeks ago I posted how we tiled the fireplace (click here). So, let’s start and go over how we built the surround.  We ripped out the wood below the mantle, luckily our mantle was built into the drywall. This may not always be the case so if you are going to do something similar, make sure the mantle was built into the drywall or be prepared to build a support beam. Since the sides have nothing to screw into, take a small block and screw it up into the mantle. Then that will give you something to screw the sides in. Do this to all sides and in the front of the mantle. Of course all sizes and measurements depend on how big your mantle is and how far you want to go out. the width of mine is 4 1/4 inches.

Image

We used primed wood but the bigger piece wasn’t primed in the size we needed but I had primer on hand, so that wasn’t a big deal. Once the frame of the surround is all on you want to work on your “boxes”. Again, this all depends on what sizes you want.

Image

We used a brad nail gun to put them in place:

Image

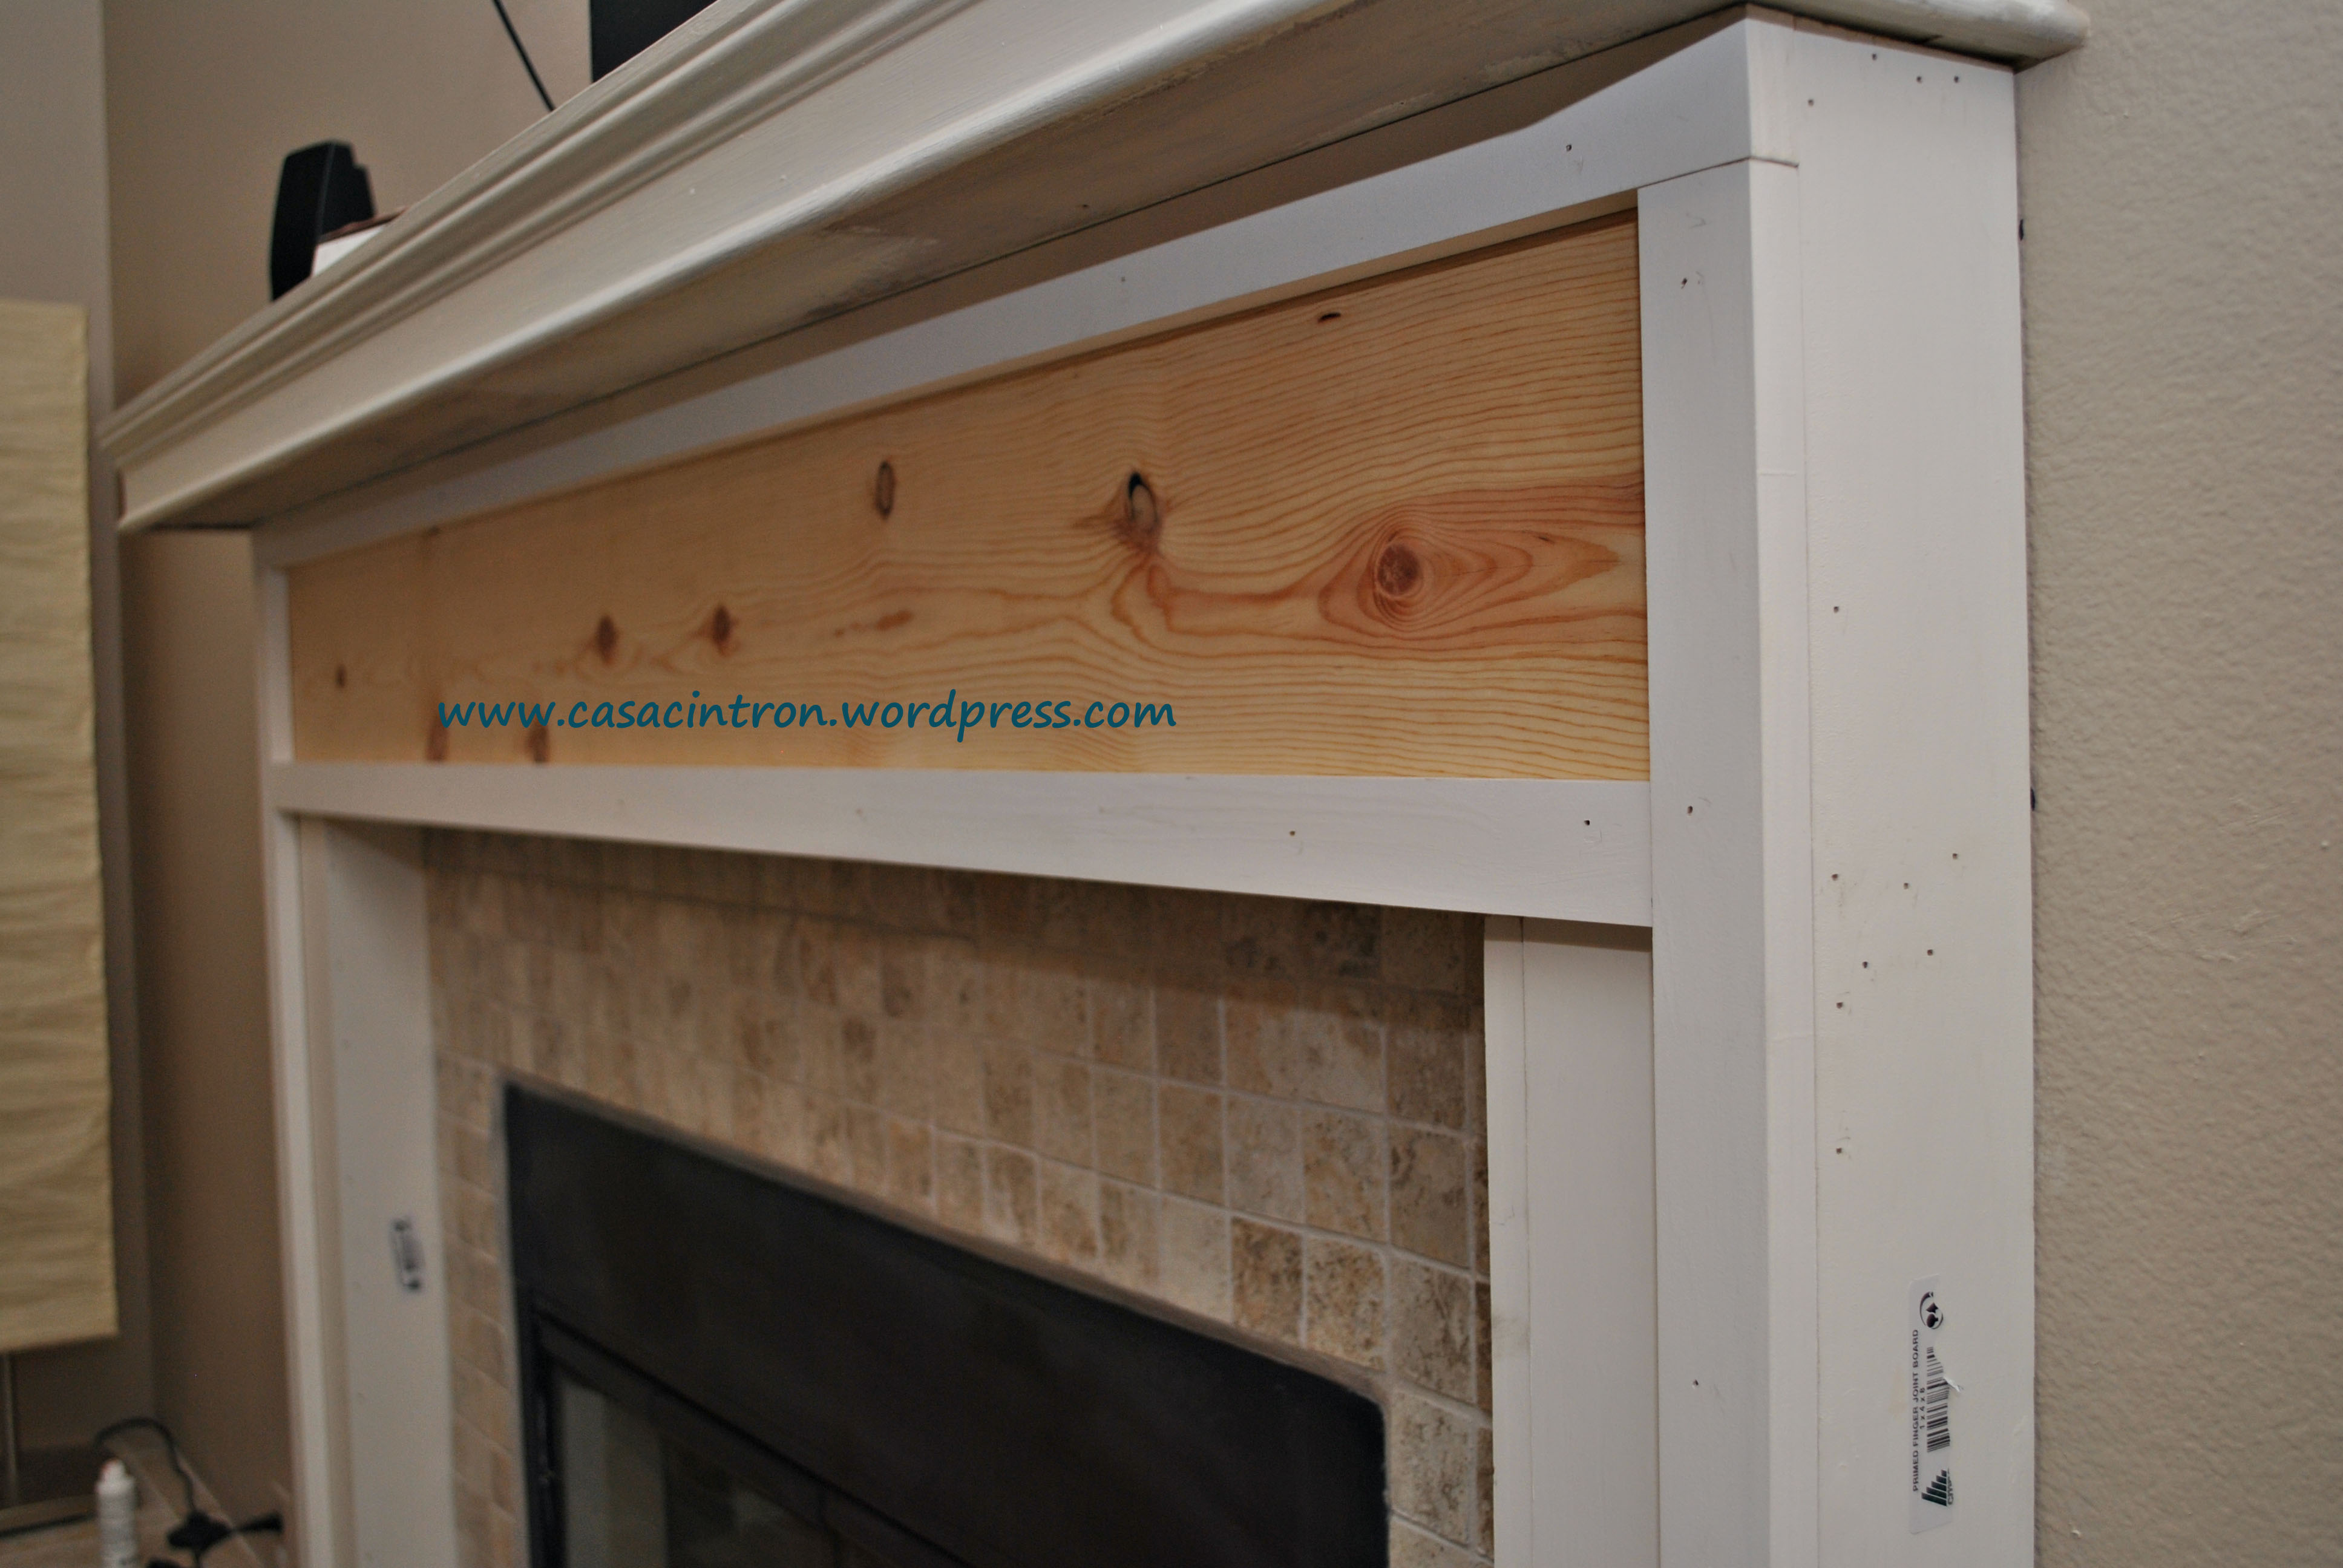
And Ta-Da! The rest is all cosmetic work! I lightly sanded the pinewood and gave it about two or three coats of primer. Then I used wood filler and put it over all the holes from the brad nail gun. You just take a little and lightly spread it over the hole. Use the spackle knife to get it as flat as you can. It takes about 15 minutes to dry and then when it’s dry, you can sand over it to get it nice and smooth. Then I gave it all a coat of paint (I used swiss coffee).

 Image

And drum roll pplleeeaasseee……………..

Image

Image

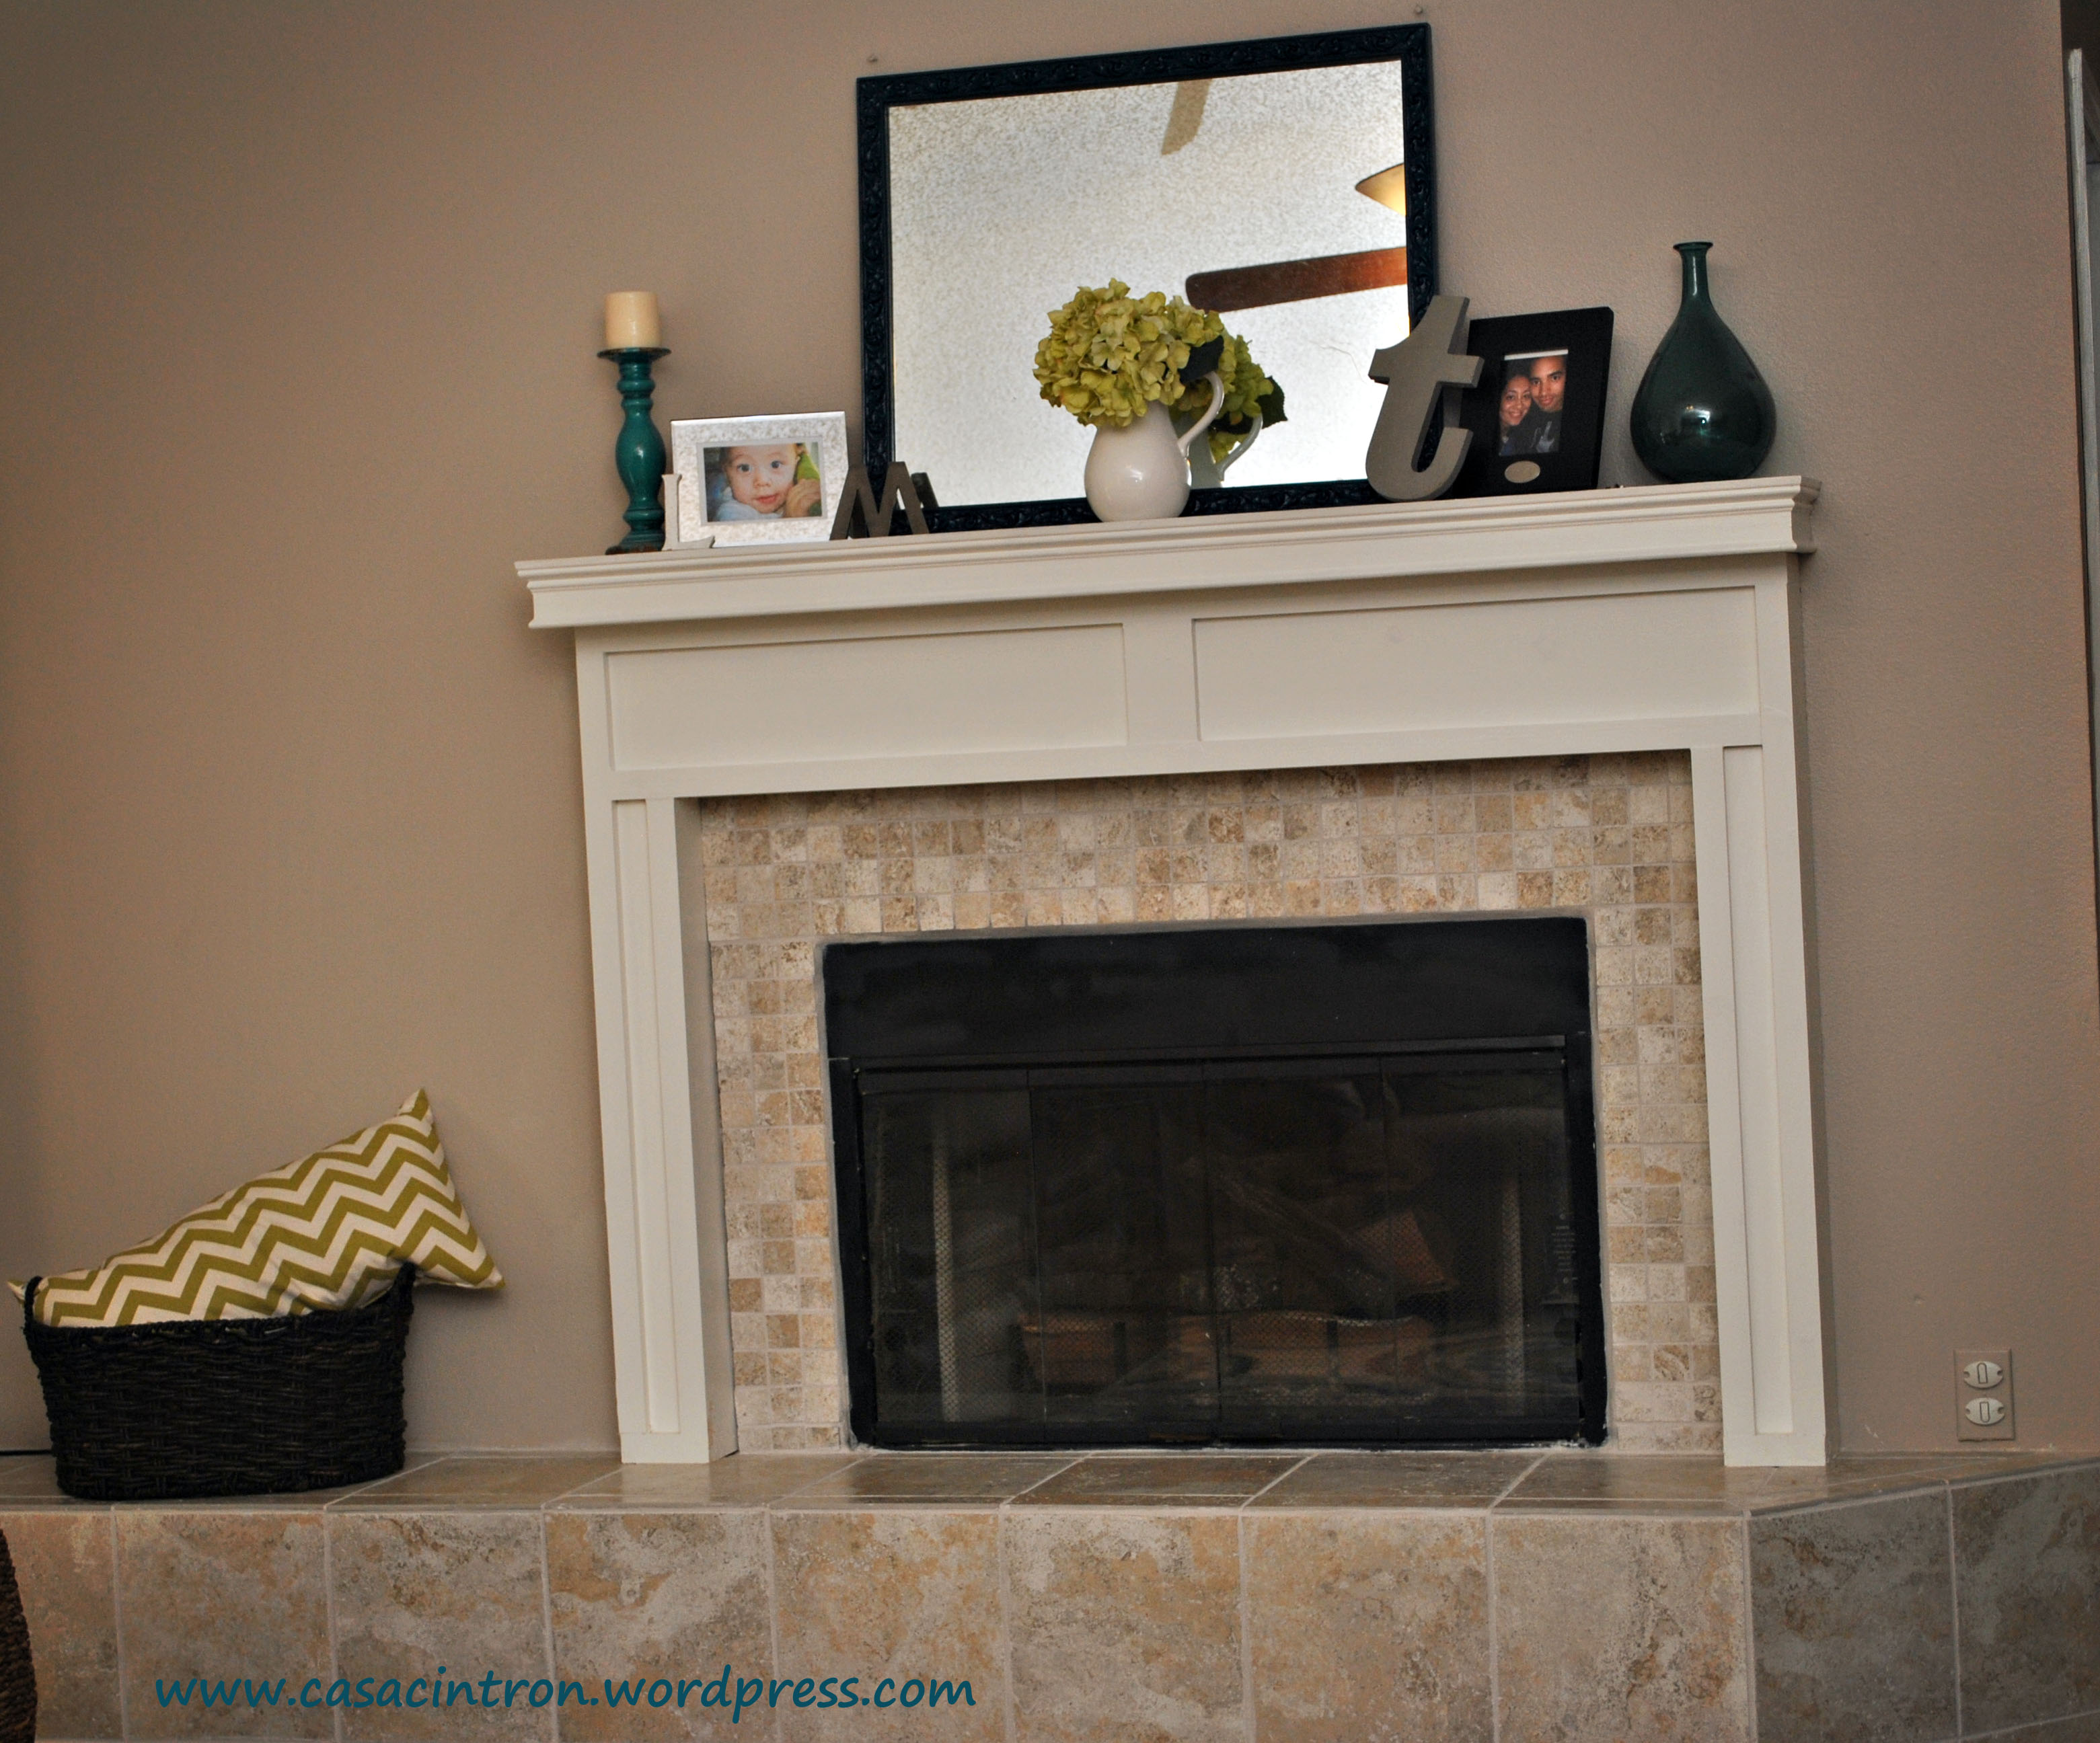
This project was a lot of firsts for us; first make over, my first time tiling…And it doesn’t stop here! We just finished laying pergo floors in the family room and gave this room a huge make over! Stay tuned folks!

Cafe Cintron

Not that long ago I gave my front door a stellar make over (If you haven’t checked it out yet, click here).  Well, what I forgot to tell you is that I didn’t think a quart of paint would be enough so I got a gallon. Um, wrong. Even for two-three coats for two big doors, I barely made a dent. That can of paint was not cheap so I plan on getting my money’s worth!

A few different coffee stations have been floating around pinterest. Two thoughts immediatly come to my brain: 1) Hey, I love coffee. 2) I want one.

So, coffee bar planning begins. First thing I needed was a cabinet of some sort. Do I build one? Do I buy one? Do I repurpose? Well, thanks for Craigslist I picked up this perfect cabinet for 20 buckaroos. Oh yeahh! It’s adorable. It’s promising. And it’s way too country. The only before picture I have is this crappy cell phone picture.

Image

Cue 50 gallons of left over teal paint. Hubby gave this a good sanding and painted it with a small foam roller. We haven’t sealed it or anything and so far it seems to be holding up fine! The knobs on it were rusty and just not my style, even if I spay painted them. I found a pack of four mercury knobs at homegoods and thought that would be perfect! The handles for the drawers I found at Lowes. I think they have such cute and girly lines which go well with the curvy and girly lines on the bottom of the cabinet.


On top is our keurig, a DELICIOUS candle that smells of baked cookies (but without the calories!), and two storage containers that we keep our sugar and ground coffee.

Above the cabinet, I wanted this shelf but couldn’t bring myself to spend 120.00. Luckily, Homegoods pulled through for me again! I got this one for $90 less!! Oh, it feels SO good to get a deal like that!! In there, I keep my k-cups and hide my “vintage” thermomater.

Here is a complete view:

What do you think? I love it! The only thing I have to do is get the right size hinges for the cabinet doors and she’ll be all done! Will you be creating a coffee bar soon?

First Impression {Front Door Make Over!}

I’m pretty sure I had one of the ugliest front doors out there. In a lot of ways, that door was like me on the weekends after cleaning house and running after a two year old. Make up smeared on my face, hair frizzed and coming out of my pony tail, bags under my eyes and nail polish chipping. Pretty picture, right? But come the week, hair is smoothed out, make up is in place and my nail polish is nice and fresh. That’s what my front door needed. It’s such a cute little patio with nice blue-gray slate and two big columns flanking the solid wood double doors. However, it is not easy on the eyes!

After a million paint swatches, I finally settled on a nice deep and saturated teal, appropriately named “Teal” by Benjamin Moore.  There are a lot of tutorials on how to paint a front door. The majority of these involved taking off the door. Let’s be honest, I live in Florida. It’s August. I’m doing this by myself. I have a toddler. Not happening. So to do this the most efficient (not lazy!) way, I did a quick cleaning on the door and sanded everywhere. I taped the edges and around the door handle because I couldn’t be bothered to take that off either.  My favorite tape to use when painting is Frog Tape.  I used a small foam roller and then a brush for the edges.

World, Meet my new front door:

I created some vingettes on either side of my front door to help created a more warm and lived in feel. On the left side I have mona lavender in a white ikea pot. After eyeing this cute little bunny rabbit for a long while, I finally snagged him from Pier1 last year.

On the right side, I have mint, cuban oregano, ivy, and my beloved hosta.

Much better! I can’t help smile now when I walk to my front door! I’m on the look out for a new doorbell since mine is old and gross. Anybody have any suggestions?

Well, off I go! I have some a fireplace to make over!

Easy Peasy

I figured my first posted project should be something that wouldn’t scare away anybody. This is probably one of the easiest and cheapest projects! What you need is a vase (bought or one you own), paint, and a paper plate. I got this vase at the dollar store. Not super impressive but had cool wave lines so I could see some potential. Cost a dollar. Ikea has another cool small vase that I got for .79 – awesome! I got the craft paint at Michael’s Craft store. They always have really good coupons so thanks to their 50% off coupon I got the paint for .50 cents! Side note – if you download their App on your smart phone, you can access their coupons from your phone and never have to worry about printing coupons. They scan it right from your phone. Gotta love the 21st century!

First step is to pour some of the paint in the vase. You’ll want to put just a tad of water to help the paint move easier. Roll the paint around until it’s completely covered with the paint. Keep adding more paint in there as needed. Then you place it upside down on the paper plate to let it drain. The most important part is to let it dry. It’s also the hardest because I was so excited to turn it right side up and put it in my entertainment center. Ok, so I did that for my other vase that I’m not showing you. You’ll get gross streaks. Trust me, wait. You’ll want to do more! It’s such an easy and cheap project and it’s a great space filler.

So, what are you waiting for? Let the vase transformation begin!